Welcome to the wonderful world of seed starting! Whether you’re a seasoned gardener or a curious beginner, nurturing tiny seeds into healthy seedlings is a rewarding experience. This guide will walk you through the basics, taking you from choosing seeds to witnessing those first green sprouts.
Gathering Your Supplies:
Before diving in, you’ll need a few essential items:
- Seeds: Choose high-quality seeds from a reputable source. Consider starting with easy-to-grow varieties like tomatoes, peppers, or lettuce.
- Seed Trays or Pots: Shallow containers with drainage holes are ideal. Recycled egg cartons or plastic containers with drainage holes poked in work too!
- Seed Starting Mix: Opt for a lightweight, well-draining potting mix specifically formulated for seedlings.
- Watering Can or Spray Bottle: Use a gentle spray to avoid disturbing the seeds.
- Heat Mat (Optional): Provides bottom warmth, beneficial for germination of some seeds.
- Grow Lights (Optional): If natural sunlight is limited, invest in grow lights to provide seedlings with the light they need to thrive.
Planting Your Seeds:
- Moisten the Potting Mix: Fill your containers with the seed starting mix and dampen it thoroughly. Aim for moist, not soggy.
- Planting Depth: Refer to the information on your seed packets for the recommended planting depth. Generally, seeds should be planted 2-3 times their diameter deep.
- Sowing the Seeds: For larger seeds, sow them individually. For tiny seeds, you can sprinkle them sparsely and gently press them into the soil.
- Labeling: Don’t forget to label your pots with the plant variety and planting date!
Creating a Germination Oasis:
- Light & Warmth: Most seeds need warmth to germinate. Place your trays in a warm location (around 70°F) with bright, indirect sunlight. Consider using a heat mat for extra warmth, especially for seeds with specific germination temperature requirements.
- Maintaining Moisture: Keep the soil consistently moist, but not wet. Use a spray bottle to gently water the surface.
- Humidity Dome (Optional): A clear plastic dome placed over the tray helps retain moisture and create a mini greenhouse effect.
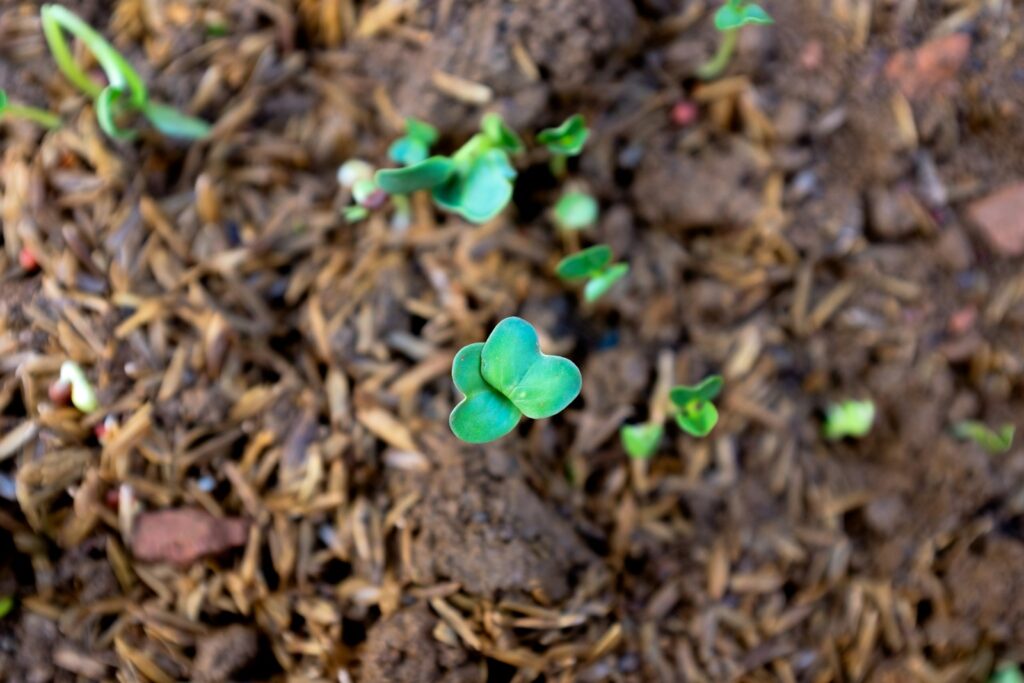
Witnessing the Miracle of Germination:
- Sprouting Time: Depending on the variety, seeds can take anywhere from a few days to a few weeks to germinate. Be patient and keep the soil moist.
- Once Sprouted: Once you see those beautiful green shoots, gradually introduce more ventilation by removing the humidity dome (if used) for a few hours each day.
From Seedling to Strong Sprouts:
- Light is Key: As your seedlings grow, they’ll need plenty of bright light. South-facing windows are ideal, or consider using grow lights.
- Watering Wisely: Water regularly, allowing the top inch of soil to dry slightly between waterings.
- Thinning Seedlings (if needed): If you planted multiple seeds per pot, you’ll eventually need to thin them out to allow for proper growth. Follow the spacing recommendations on your seed packets.
Congratulations! You’ve successfully nurtured your seeds from tiny beginnings to healthy seedlings. Soon, they’ll be ready to transplant outdoors and continue their journey to becoming bountiful plants.
Bonus Tip: Check back for our next blog post where we’ll discuss the art of hardening off your seedlings and successfully transplanting them to their permanent home in the garden!
Are you interested in staying up-to-date with the latest information about seeds? Join the Beej Bhandar Family today! Our community is dedicated to sharing valuable insights and keeping you in the know about everything related to seeds. Don’t miss out on this exciting opportunity to connect with like-minded individuals and enhance your knowledge about seeds. Join us now!